3 Ways to Post on Instagram from a PC or Mac
Tired of posting on Instagram from your phone? Wondering how to post on Instagram from your PC or Mac instead? We shared previously how Instagram released desktop posting, giving users yet another way to post their content.
Posting on Instagram from your desktop can save you time and offer more flexibility in what you can upload (such as edited videos and images). And you can do it without having to upload them onto your phone first.
Below we’ve outlined three different ways to post on Instagram from your computer.
Method 1: How to post on Instagram from your browser
As of October 2021, all Instagram users can create and publish feed posts from the browser version of the app.
To post on Instagram from your desktop computer (PC or Mac), follow these simple steps:
- Go to instagram.com and sign in to your account.
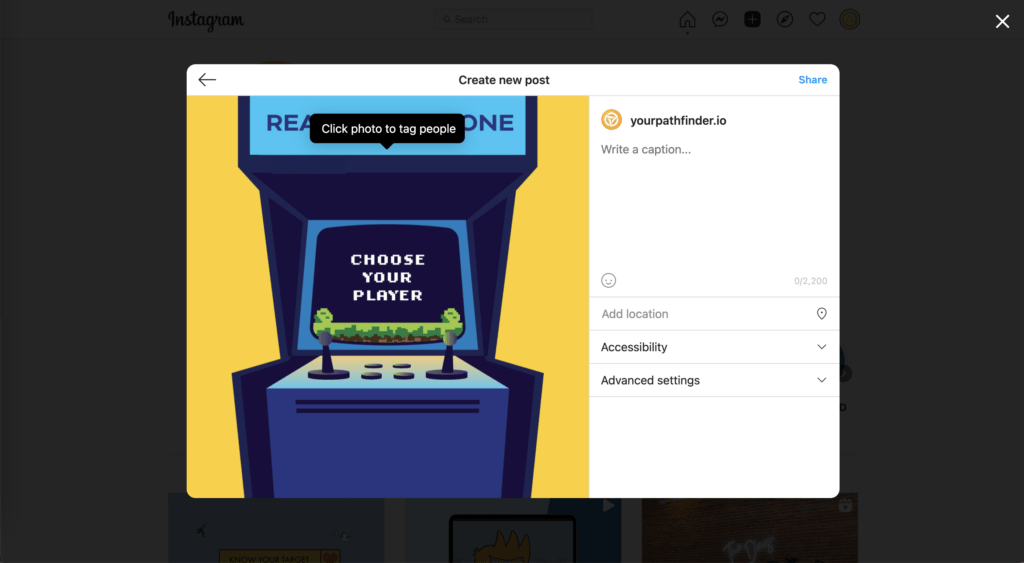
- Click the plus symbol in the top right corner of the screen (it’s the same button you would use to create a post in the mobile app). A Create new post window will pop up.
- Drag photo or video files into the popup window, or click Select from computer to browse and pick files from your PC or Mac. If you want to create a carousel post, you can select up to 10 files.
- Click the frame icon in the bottom left corner of the popup to change the ratio of your image or video. You can also use the zoom feature (looking glass icon in the bottom left) and drag your file to edit your frame. When you’re done, click Next in the top right corner.
- Edit your image. You can select one of 12 preset effects in the Filters tab or go to the Adjustments tab and manually adjust specs such as brightness, contrast and fade. Click Next.
- Write your caption. Click on the smiley face icon to browse and pick emojis. You can also type in a location in the Add location bar, restrict commenting in Advanced settings and add alt text to your files in the Accessibility section.
- Click Share.
Method 2: How to post on Instagram from your computer using Creator Studio
If Instagram is your social network of choice and you don’t mind not having all your social networks in one dashboard, Creator Studio could be a good option for you.
Note that when using Creator Studio, you can post and schedule all types of posts other than Instagram Stories.
How to post on Instagram using Creator Studio:
- Make sure you are connected to Instagram in Creator Studio.
- Navigate to the Instagram section.
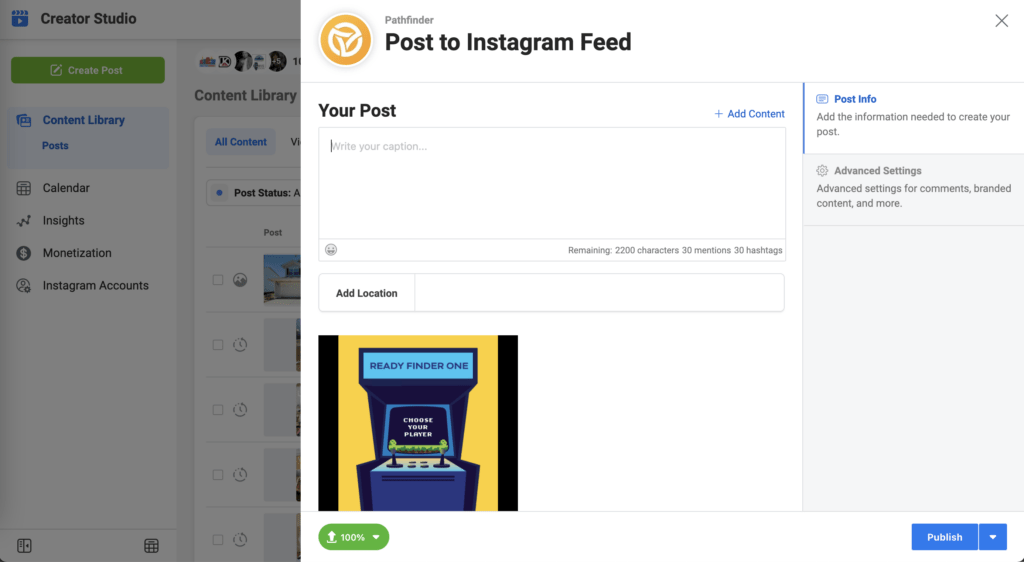
- Click Create Post.
- Click Instagram Feed.
- Choose the account you want to post to (if you have more than one Instagram account connected).
- Add a caption and a location (optional).
- Click Add Content to add photos or videos.
- Next, choose between these 2 options:
- Click From File Upload to upload new content.
- Click From Facebook Page to post content that you’ve already shared on your Facebook.
- (Optional) If you want to simultaneously post this content to the Facebook Page connected to your Instagram account, check the box next to your Page under Post to Facebook. You can add additional details to your Facebook post after you publish to Instagram.
- Click Publish.
Method 3: How to post on Instagram from your computer using a third party app
You can also use a third party app to post via your desktop. Third party apps may also include features such as: analytics, sharing to multiple platforms at once, batch scheduling, content inspiration, and more. Keep in mind, most apps will require a paid membership to unlock these features.
While Instagram has taken notice of these apps and regulated how they are to be used today, there are still some fantastic, approved apps that would be a great addition to your digital marketing regime.
Here are some approved and recommended apps to try:
Wait… there’s more!
How to post an Instagram Story from desktop
You can now create, edit, and schedule your Stories in advance using Facebook Business Suite.
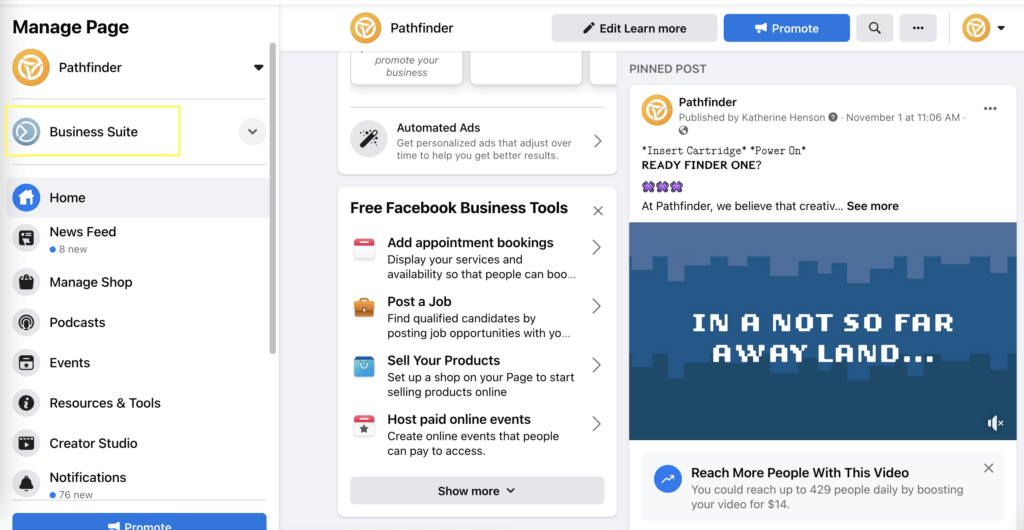
Step 1: Navigate to Business Suite
Go to your Page and pick Business Suite from the menu on the left side of the screen.
Step 2: Start drafting your Story
- the Posts and Stories item in the menu on the left side of the screen
- the Create Story button in the center of the dashboard
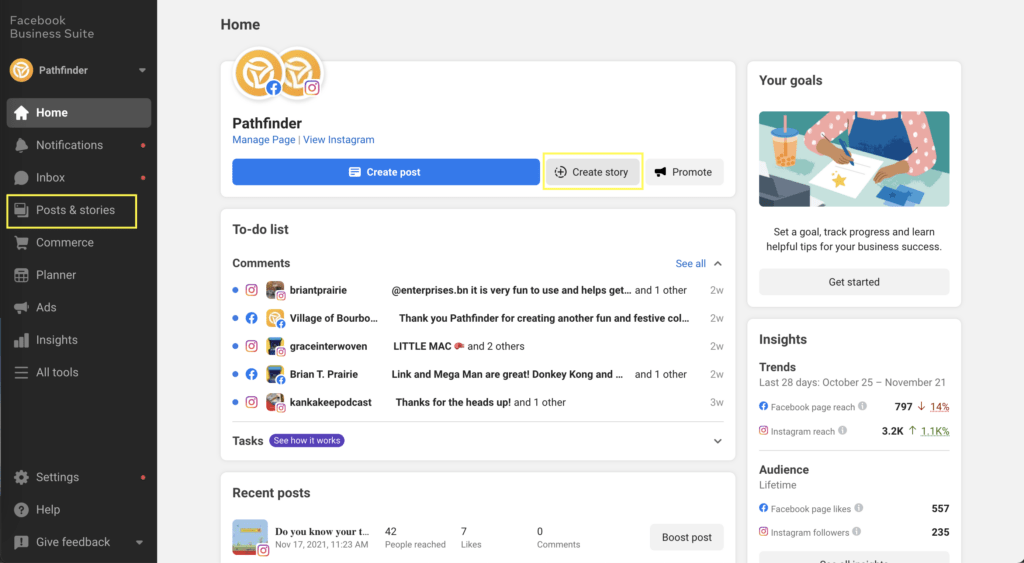
Once you click on one of these options, a Story creator window will pop up. Here, select the account you want to share your Story to, and upload an image or video to start working on your Story.
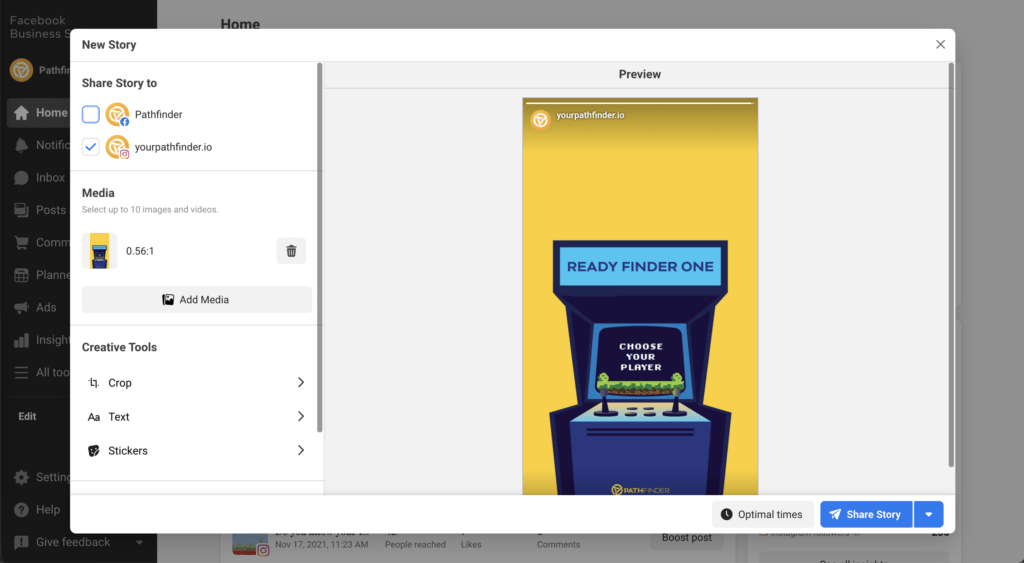
The Story editing options in Business Suite are more limited compared to what you can do in the Instagram app.
Step 3: Schedule your Instagram Story
Once you’re happy with your creation, click the arrow beside the Publish Story button for scheduling options.
You can confirm that your Story has been scheduled by navigating to Posts and Stories, then Stories. You can see current, scheduled, and archived stories here. This is also where you can manage your post — reschedule it, publish it immediately or delete it from your pipeline.
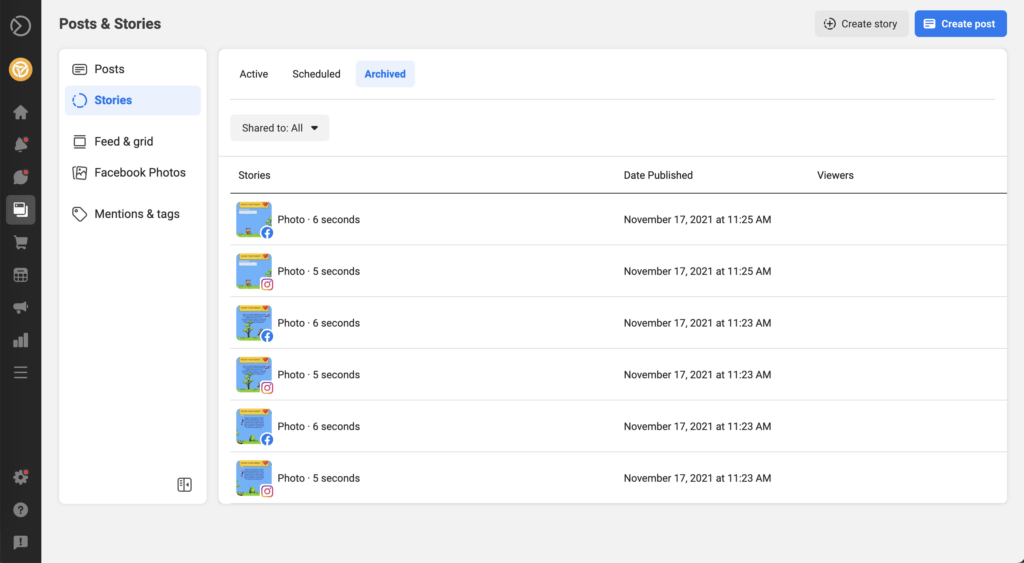
Posting directly to Instagram via the app may have the most features and control, there are many options to post whenever and wherever you are! You are not limited. Instagram is an important and powerful tool for your business, and there’s no reason to not make the post.
Need help getting set up, creating a posting cadence, or design for your social media graphics?


