

Best Practices When Using a Green Screen

Why A Green Screen?
There are some locations that Pathfinder just cannot film at. The moon, for example. With a green screen, however, we have access to every location in the world, provided we can find a free stock photo.
Of course, there are some general principles to follow when shooting with a green screen. Without the proper lighting, composition, and know-how, a green screen is just an ugly blanket. Let’s take a look at some key tips to follow that ensure your footage is crisp.
Lighting
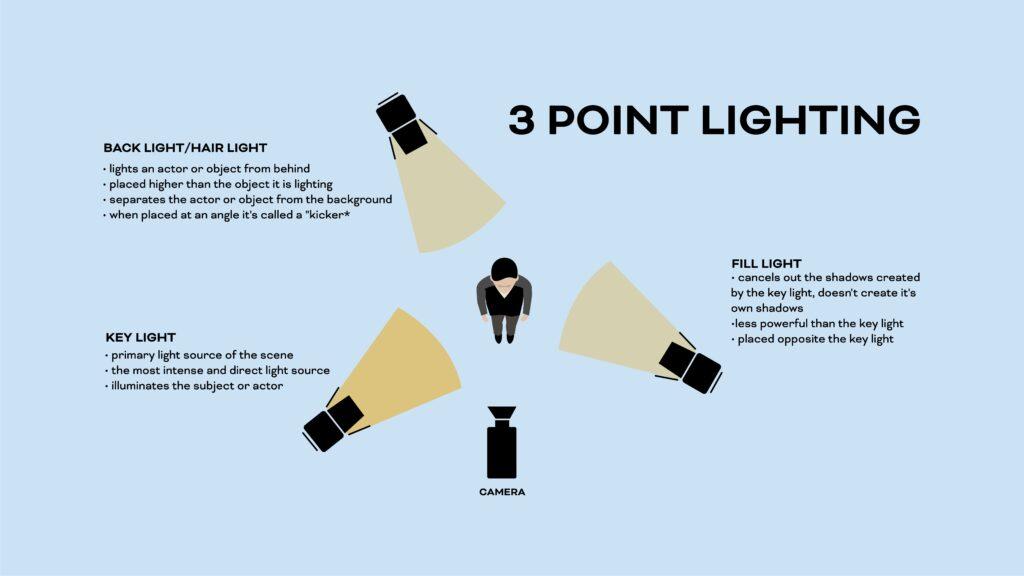
Lighting is everything when using a green screen. Just like any other shot, properly lighting your subject is your first priority. For that, follow the basic 3 point lighting principles as demonstrated above. After that, you’re going to want to make sure your backdrop is very well lit. Without smooth, even lighting, the green screen will appear to have multiple shades of green to the eye of the camera. This isn’t a dealbreaker, but it does make removing the background much more difficult in post.
Green Screen Composition
This one is easy. Your subject needs to have some distance from the green screen. The benefits here are two-fold: One, it ensures that the green light doesn’t bounce back and bleed onto the edges of what you are filming. Two, your subject won’t cast shadows onto the backdrop.
The size of your green screen will determine how far away from it your subject can stand, but we recommend at least 3 feet of distance.
Know-how
So you’ve shot your footage, imported it into your editing, and you’re ready to get started. To your surprise, you messed it all up. Maybe it was windy that day and you had to shoot outside, or maybe there was a window behind your background that you didn’t notice. Thankfully, you have options.
If you’re struggling to remove your background, you can mask out the footage and stack them to create a composite effect that removes each section of the green screen that is giving you problems. We’ve had to use this technique in the past, and this video was a huge help for us.
Still not confident? Take a look at the video we shot to further break down these concepts to help!
Still need some help? No worries, Pathfinder is here for some hands on help! Just reach out to our team today.